After you install a gantt chart
By Prairie Loom editorial team Verified against the current GanttProject release on GitHub Releases
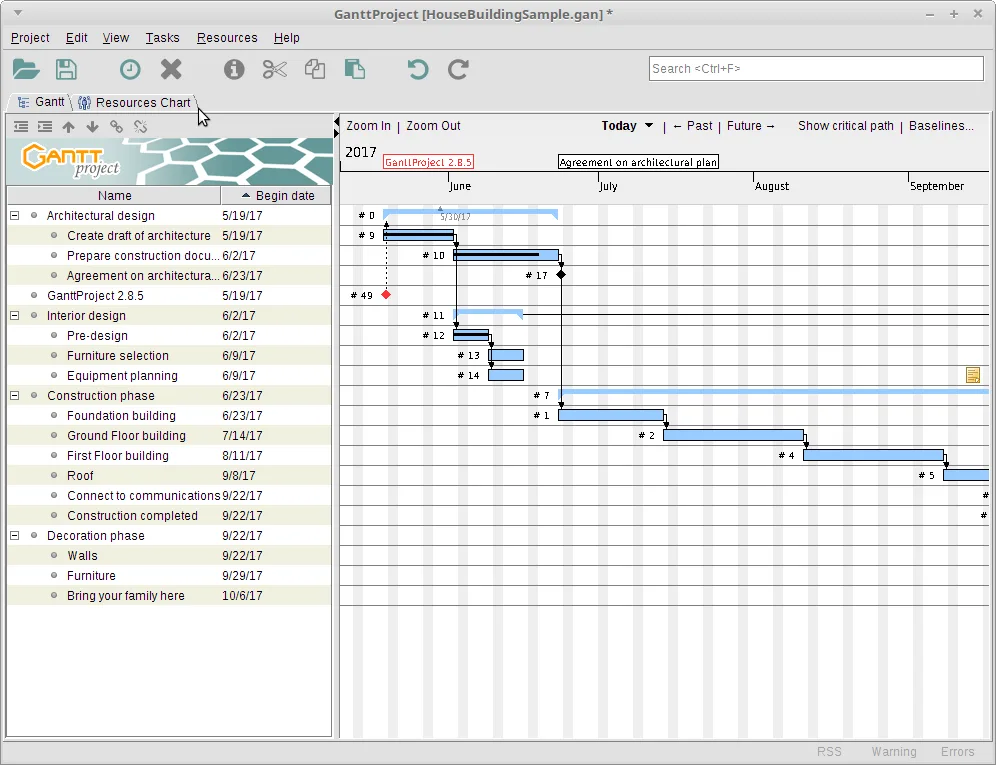
You landed here from the download button. Finish the installer if it is still open, then launch GanttProject once. The goal of this hour is a trustworthy local gantt chart file, not every advanced feature.
1. Confirm the binary
Check that you installed from a ganttproject-* GitHub release asset or from the Homebrew cask. If the Start menu entry looks wrong or the About box names a different product, uninstall and restart from the download-safe page.
Windows MSI installs should list GanttProject under Apps. macOS should show it in Applications. Linux should show a desktop entry after the deb install.
2. Create a tiny project
Use File → New (or the equivalent new-project action in your build). Add three tasks with clear names and short durations. Indent one task under another to see hierarchy on the gantt chart.
Save immediately as a .gan file in a folder you control. Downloads is a bad long-term home for schedules.
3. Link dependencies
Connect two tasks with a finish-to-start link on the gantt chart. Move the predecessor’s finish date and confirm the successor moves. If nothing moves, you painted bars without true dependencies—fix that before you invite stakeholders.
4. Add a milestone
Mark a release date or deadline as a milestone so the gantt chart shows a fixed event. Milestones keep reviews honest when everything else is flexible.
5. Optional baseline
If your build exposes baselines, set one before you reshuffle dates. Comparing plan versus actual is one of the quiet strengths of a real gantt chart tool.
6. Glance at resources
Assign a person or role to one task and open the resource load chart if available. You do not need perfect calendars on day one; you need to know where the view lives.
7. Export once
Export PDF or PNG and open the file outside GanttProject. If a teammate cannot read the timeline, adjust zoom and labels, then export again. HTML export helps when someone wants a browser view.
8. Decide the update door
Write down whether this machine used MSI, EXE, DMG, Homebrew, or deb. Future updates should use the same door. Return to GitHub Releases for GitHub installs; use brew upgrade for cask installs.
Import later
Only after the tiny gantt chart works should you import MS Project or spreadsheet plans. See import a project plan. Comparison notes: vs Microsoft Project.
Habits that keep schedules honest
Name tasks as deliverables, not vague verbs. Keep durations realistic. Resist the urge to turn every meeting into a bar. A clean gantt chart with twenty true tasks beats a cluttered chart with two hundred decorative ones.
Back up the folder that holds .gan files. Treat that folder like source code. If you collaborate, agree whether WebDAV or GanttProject Cloud is in scope; offline files remain enough for many teams.
When updates look wrong
When something looks wrong after an update, compare the asset name you installed with the current Releases list before you chase obscure preferences. Most “broken gantt chart” reports after a reimage are simply the wrong binary or a missing project file path.
More how-tos live under guides, including Windows install, safety, first run, and troubleshooting. The home hub remains the fastest path back to the install panel for the next machine you set up.
Help other people install
If you support other people, send them this page plus the Releases URL. Do not send a private MSI copy that will go stale. A shared checklist keeps every gantt chart host on the same update door and the same proof steps after install.
Thirty-minute cleanup
Next week, delete unused draft projects, confirm the baseline still means something, and export a fresh PDF for anyone who still reads email attachments. Small maintenance keeps the timeline trusted when dates get stressful.
- Confirm the asset pattern on this machine.
- Confirm the project folder path is backed up.
- Confirm one update door for the next release.
If you support other people, send them this page plus the Releases URL. Do not send a private MSI copy that will go stale. A shared checklist keeps every host on the same proof steps after install.